Saltar al contenido

Struggling to find the perfect canvas for creative ideas? Many materials are tough to work with or aren’t eco-friendly. Muslin bags solve this, offering a simple, sustainable start for any project.
Muslin bags are perfect for DIY projects because their thin, soft texture makes them easy to cut, sew, and decorate. Made from natural, breathable cotton, they take color beautifully and are an excellent eco-friendly choice for crafters of all skill levels.
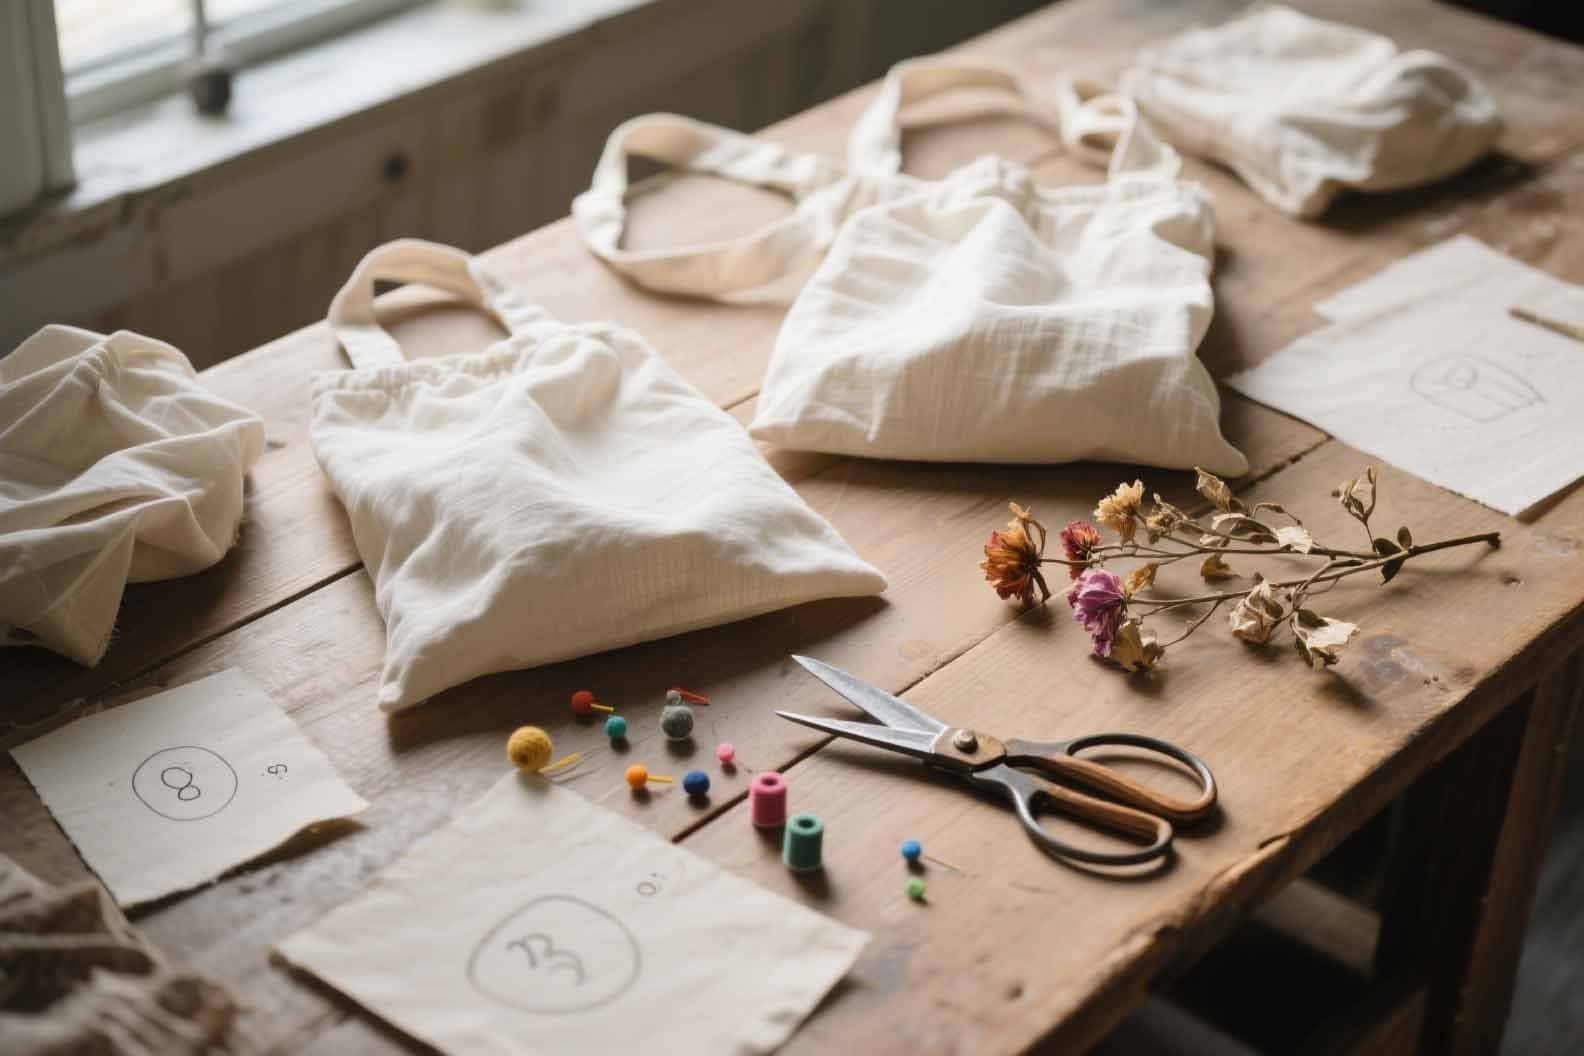
For any business or creator, packaging should feel personal and tell a story. It’s common to try different materials, but many fall short. Muslin bags are the ideal solution. They are simple, natural, and present a blank slate waiting for an idea. This versatility opens up a world of creative fun. Let’s explore why these simple bags are the perfect partner for any creative project.
How can beginners start decorating muslin bags?
Want to be creative but feel a little intimidated by complex projects? It can be discouraging. The good news is that simple decorations like ribbons and doodles can make a huge impact on a muslin bag.
Beginners can easily decorate muslin bags using external adornments like ribbons, lace, or simple hand-drawn doodles with fabric markers. These methods require minimal skill but create beautiful, personalized results that look amazing.

The best way to start any new hobby is with a small, easy win to build confidence. That means not trying to create a masterpiece on the first try. Simply grabbing some fabric markers and doodling on a muslin bag is a great, pressure-free start. The smooth surface of muslin is very forgiving and is perfect for these simple, yet beautiful, designs.
Quick and Easy Adornments
The goal is to add a personal touch without needing years of experience. Think about things that can be added to the surface of the bag. Below are a few ideas that are accessible to anyone, regardless of skill level.
| Técnica | What You Need | Why It’s Great for Beginners |
|---|---|---|
| Fabric Markers | Fabric markers in various colors | As easy as drawing on paper. Great for names, quotes, or simple patterns. |
| Ribbons & Lace | Ribbons, lace, fabric glue | No sewing needed. Just glue or tie them on to add texture and color. |
| Rubber Stamps | Rubber stamps and a fabric ink pad | Creates a clean, repeatable design instantly. Perfect for logos or themes. |
Don’t overthink it. Just pick one and give it a try. The joy is in the making, and the results are surprisingly professional.
Ready for a challenge? How to personalize with printing and embroidery?
Have you mastered the basics and want your creations to feel more unique? Simple doodles are great, but now it’s time to make something that truly stands out. Printing and embroidery can help.
Take your DIY skills further by personalizing muslin bags with simple embroidery stitches or using iron-on transfer paper for custom prints. You can also try creative dyeing techniques with natural plants for unique colors.
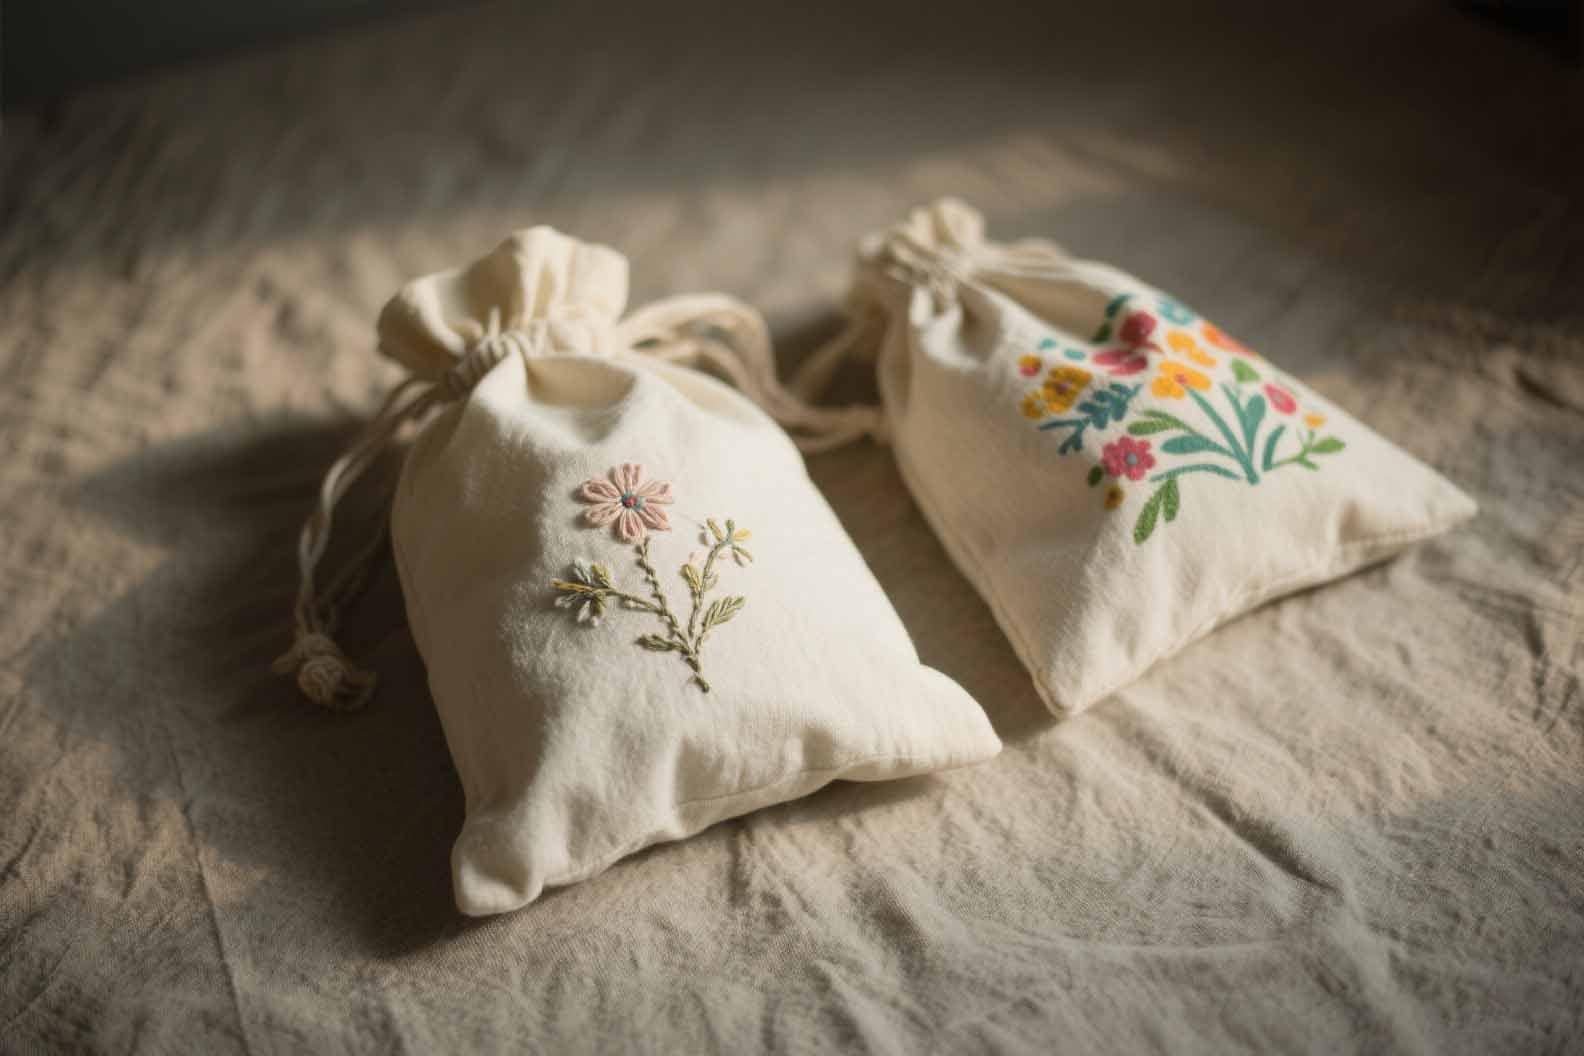
Once comfortable with markers, the next step is adding texture. Bordado1 may seem like a big leap, but starting with a simple running stitch to outline a shape is incredibly rewarding. At the same time, using iron-on paper2 to print a photo or logo onto a bag can feel like magic. These next-level techniques open up so many more doors for personalization. They turn a simple bag into a real keepsake.
Printing vs. Embroidery: What’s Your Style?
Both printing and embroidery add a professional touch, but they offer different styles. Printing is great for sharp, graphic designs, while embroidery gives a soft, handmade texture.
| Técnica | Pros | Contras | Lo mejor para |
|---|---|---|---|
| Iron-On Transfers | Fast, easy to use for complex images. | Can sometimes feel stiff, may crack over time. | Photos, detailed logos, or graphic text. |
| Basic Embroidery | Adds beautiful texture, very durable. | Can be time-consuming, requires practice. | Names, monograms, floral and nature motifs. |
| Natural Dyeing | Creates unique, organic colors. | The result can be unpredictable. | Achieving a soft, one-of-a-kind color palette. |
Experimenting with creative techniques, like dyeing bags with natural items like avocado pits, can yield surprising and beautiful results, like a dusty pink color. It’s a great lesson in embracing the creative process.
How can you create statement pieces with mixed media?
Are you an experienced crafter looking for a real project? Standard techniques can feel a bit limiting. It’s time to combine methods to create something that is truly a piece of art.
For advanced creators, muslin bags become a canvas for statement pieces. Combine techniques like intricate tie-dye patterns with more complex, multi-layered embroidery to create a truly one-of-a-kind, mixed-media accessory.

The best creations often come from breaking the rules a little. Why choose between dyeing and embroidery when you can do both? An advanced project isn’t about being perfect; it’s about being brave. It’s about layering different textures and colors to tell a richer story. Think of the muslin bag not just as a bag, but as a canvas. Beads, patches, or different fabric swatches can be added. There are no limits when mixing media.
Combining Techniques for Maximum Impact
This is where creativity can run wild. The idea is to layer different DIY methods to build depth and interest. A tie-dyed bag is beautiful on its own, but when you add embroidered stars on top, it becomes a galaxy.
Here’s a sample project idea to get started:
| Project: The "Garden Party" Bag |
|---|
| Step 1: Create the Base |
| Use natural plant dyes (like onion skins for yellow or spinach for green) to create a soft, watercolor-like background on the bag. |
| Step 2: Add Embroidered Details |
| Once dry, use green and pink embroidery floss to stitch simple flower stems and petals over the dyed background. |
| Step 3: Add 3D Elements |
| Sew a few small beads or buttons into the center of the embroidered flowers to give them a final, tactile pop. |
This process transforms the bag from a simple container into a piece of wearable art. It reflects skill, patience, and a unique vision.
How can you use muslin bags for holidays and events?
Store-bought decorations and gift wrap can feel impersonal. You want the gifts and favors given out to feel special and thoughtful. BRICOLAJE muslin bags are the perfect solution for any occasion.
Customize muslin bags for any holiday or event. Create spooky treat bags for Halloween, festive gift bags for Christmas, or elegant, personalized wedding favors. They add a memorable, handmade touch to any celebration.
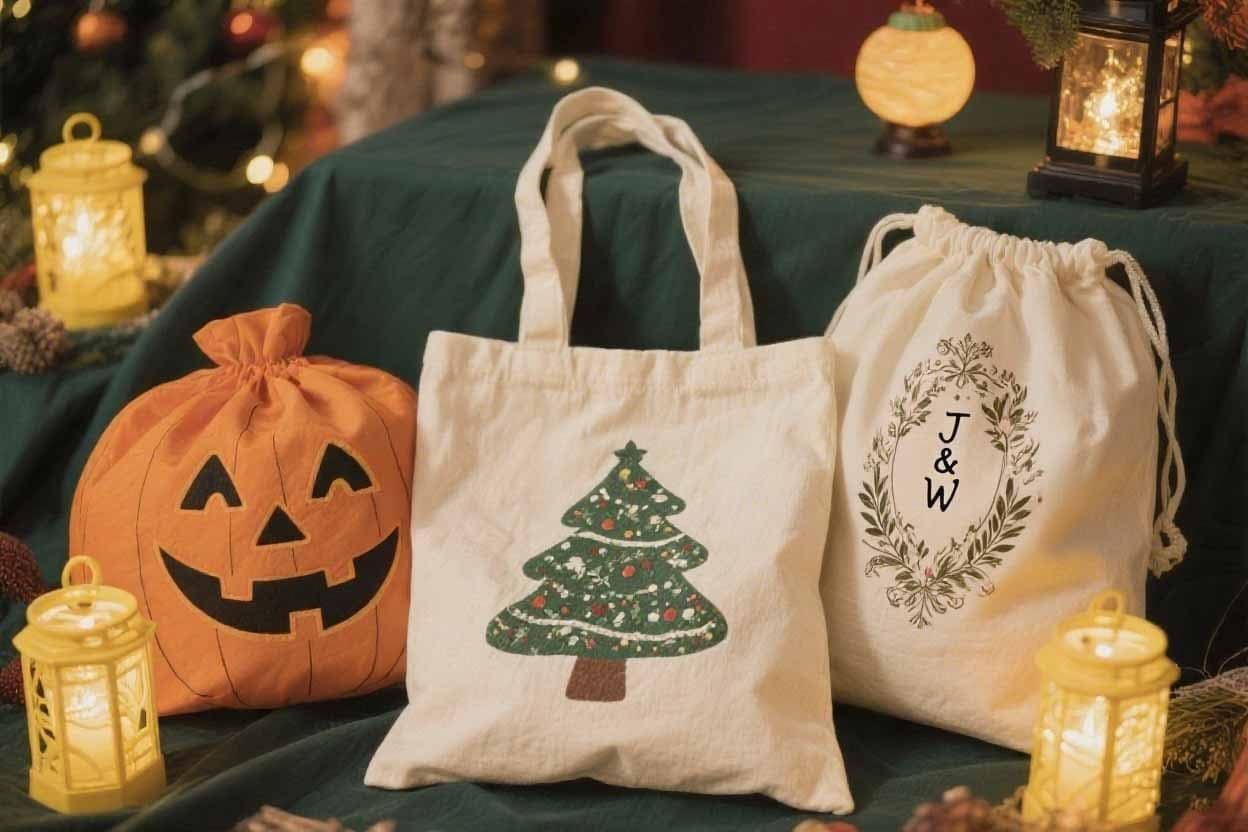
Many businesses send small holiday gifts to clients. Instead of using standard gift boxes, decorating muslin bags is a great team activity. Imagine creating bags for Christmas. The response can be incredible. Clients don’t just appreciate the gift; they appreciate the handmade bag it came in. That personal touch makes all the difference. It shows that time was taken to create something special.
Ideas for Year-Round Crafting
A muslin bag is a blank slate for any theme. Whether it’s a big holiday or a personal celebration, a custom bag makes the moment more memorable.
| Occasion | DIY Idea | Key Materials |
|---|---|---|
| Christmas | A reindeer face with a red button nose. | Brown and red felt, buttons, fabric glue. |
| Wedding Favor | Stamped with the couple’s initials and date. | A custom rubber stamp and a fabric ink pad. |
| Kid’s Birthday | Stenciled and painted with the child’s name. | Fabric paint and letter stencils. |
| Valentine’s Day | A simple embroidered heart. | Red and pink embroidery floss. |
These small, handmade items are often the things people hold onto the longest. They’re not just bags; they’re memories.
How do you preserve your beautiful DIY muslin bag?
You’ve spent time creating a beautiful bag. Now you’re afraid to ruin all that hard work by washing it. Don’t worry, proper care is simple and will keep the creation looking vibrant.
To preserve your DIY muslin bag, especially if it’s dyed or painted, gentle hand washing is best. Avoid the washing machine to prevent colors from fading and to protect any delicate embroidery or decorations.

It’s a common mistake to toss a beautifully painted bag3 in the wash with other laundry, only for it to come out faded with chipped paint. It’s disappointing. Treating handmade items with a little extra care is essential. A few minutes of gentle hand washing is all it takes to protect the hours spent creating the piece. It’s worth the small effort to ensure the bag lasts for years.
Washing and Storing Your Creations
The key to longevity is being gentle. Machine washing can be too aggressive for delicate decorations, and the heat from a dryer can cause fading or shrinkage.
Here’s a simple guide for keeping bags in top condition:
| Technique Used | Best Washing Method | Best Drying Method |
|---|---|---|
| Painted or Dyed | Hand wash in cold water with a mild soap. | Lay flat on a towel to air dry. |
| Embroidered | Hand wash in cold water. Be careful not to snag the threads. | Air dry. Avoid wringing it out. |
| Plain (No Decor) | Machine wash on a gentle cycle. | Tumble dry on low or air dry. |
When not in use, store decorated bags flat in a drawer or closet. This will help prevent the decorations from getting creased or damaged. Proper care ensures that a one-of-a-kind creation remains a source of pride.
Conclusión
Muslin bags are more than just bags. They are a versatile, eco-friendly canvas for all skill levels, allowing for unique personal expression and truly thoughtful, handmade gifts.
-
Exploring embroidery basics can enhance your skills and creativity, making your projects even more unique and personal. ↩
-
Understanding iron-on paper can elevate your crafting projects, allowing for unique designs and personalization on various materials. ↩
-
Find out effective methods to care for your painted bag, keeping it vibrant and beautiful for years to come. ↩