Skip to content

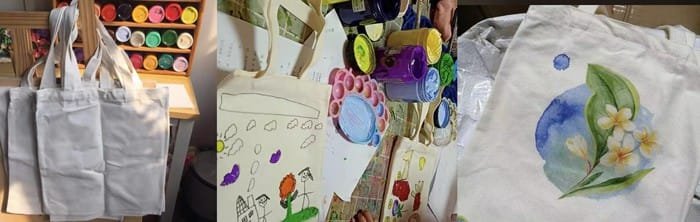
We all have owned at least one canvas bag in our lives. They are reusable, stylish, and comfortable. And here is the best thing about them: You can personalize them to your liking.
In this world full of art, you can find plenty of ways to embellish your canvas bag. On top of that, it is rewarding when you do the whole process yourself. For starters, you get a chic bag to carry around with style. Along with that, you can please your creative outlet as well.
If you think it is too difficult or that you are not artistic enough, dismiss those thoughts at once. I will let you in on a secret: I did not get the art gene from my painter mom (and I am always mourning that). But even I love to DIY my canvas bags myself because it is fun and easy.
So I have gathered some fun techniques and ideas to share with you on how to DIY your canvas bag:
Method 1: Hand-Drawn Doodles
This technique is my personal favorite. The reason? Hand-drawn doodles can portray your individuality on your canvas bag. In Gen-Z language, it brings out your vibe. And what is better than that?
Things you will need:
- Fabric markers
- Pencils
How to do it:
- Place your blank canvas bag on a table.
- Decide what you want to doodle to be. It can be a simple design as well as a complex one.
- Sketch with a pencil first to avoid mistakes. Draw the outlines of your doodle with it.
- When the pencil sketches are complete, take a look and see if you like them. Make changes as you see fit.
- Now it is time to make your doodle art permanent on the canvas bag. Trace over the pencil sketches with colourful fabric markers.
- Add highlights to make the doodle prominent.
- Your DIY doodle canvas bag is ready.
I have listed five simple doodle ideas for you here. In case your brain is not helping you come up with ideas. You can pick your favourites and start doodling right away:
- Classic cartoon/game/anime characters: Mickey Mouse, angry birds, minions, etc.
- Ethnic design. Everyone knows that ethnic designs are timeless.
- Simplistic geometric design. These have always been classy.
- Calligraphy. This one requires more skill than others. For this, you can practice a few times on a paper first.
- Full surface doodle art. This idea depends upon your preferred style of art. Besides that, it is easy to carry out to the end once you begin.

Method 2: Heat Transfer Printing At Home
A popular method to personalize your canvas bags is heat transfer printing. In general, it sounds like something only done at the industrial level. Yet, it is a popular technique for DIY designing T-shirts, towels, bags, caps, etc.
Things you will need:
- A solid table
- An ironing mat
- Vinyl (heat transfer vinyl of your required colours)
- Scissors
- Iron
- A Teflon or multipurpose sheet
How to do it:
- Draw your desired shape or design over the vinyl. Make it as neat as possible. You may have to use different coloured vinyl for one pattern.
- Start cutting the vinyl until you achieve the cut-out you plan on printing.
- Get rid of any excess vinyl in your cut-out. It is a detailed process in which you weed out imperfections. It makes your design perfect and neat.
- Cover your table with an ironing mat. It is to prevent the table from getting heat damage.
- Place your canvas bag on the table. Smooth it out so that there are no seams or irregularities in the target surface.
- Put your vinyl design on the bag.
- Place your Teflon sheet or multipurpose sheet over the vinyl.
- Set the iron temperature to 300 degrees, not more.
- Iron over the vinyl for about 10-15 seconds with pressure. Make sure every part receives heat for 10-15 seconds.
- Peel off the sheet.
- Your personalized canvas bag is ready.
More instructions:
- It is better to iron your canvas bag before placing the vinyl on it for heat printing. It will ensure smooth printing.
- Before ironing, take a minute to check that the vinyl is in the correct placement.
- Remember that too much heat and too much pressure are not a good idea. Apply both of these things in moderation, as mentioned above.
- In the same way, applying heat for too long will not make it stick better. It will ruin the adhesive.
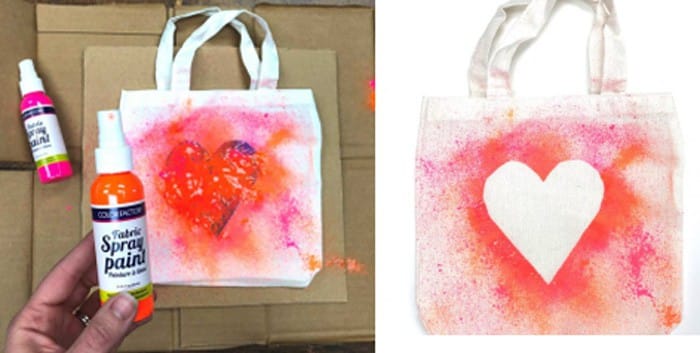
Method 3: Manual Color Spray (With a Sprayer)
If you want the quickest path to a DIY embellished canvas bag, this technique is for you.
Things you will need:
- Spray dyes
- Stencils
- Painter’s tape
- Scrap papers
- Old newspapers
How to do it:
- Start by sketching your designs.
- Cut them out to make your desired stencils.
- Spread the newspapers under your canvas bag. We do this to prevent staining the surface.
- Now tape the stencils to your canvas bag.
- Place scrap papers on the remaining surface of the canvas bag.
- Begin spraying. Use as many colours as you desire.
- Let it dry overnight.
- Your spray-painted canvas bag is ready to go.
Now let us talk about how you can use this method for different styles and colour patterns. Consider these three basic types:
- Solid dyed designs
- Speckled designs
- Combination designs
With spray dyes, you can choose your design to have a specific look. It can be bold, marked, pastel, sparkling, or breezy.
For example, if your stencil is a compact geometric design, solid dye will compliment it more. For this, all you have to do is spray close to the surface.
If you want your canvas bag to rock soft hues on a light summer day, you can choose a speckled design. In this technique, you will spray over the stencil like a shower of paint.
Whereas for the combination design, you will layer both of these designs. After you complete a solid dye as a base, you will spray a different coloured dye over it.
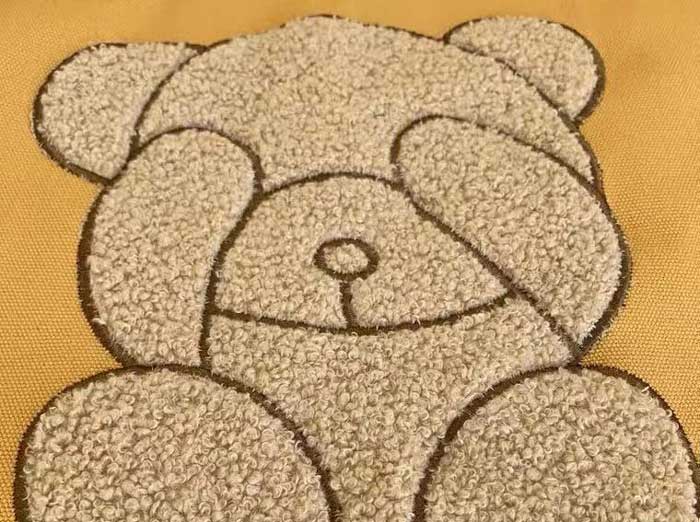
Method 4: Hand Flocking
This technique is the least heard of all when it comes to the DIY embellishment of canvas bags. But it is as captivating and fun as any!
Things you will need:
- Adhesive (coloured adhesive used for flocking)
- Water-based varnish
- A good quality brush
- Scrap paper
- Painter’s tape
- Flocking material of your choice
- A flock pump or a flock sprayer (like a paint sprayer)
- A dust mask
How to do it:
- Sketch a shape or design on your canvas bag with a pencil.
- Tape scrap papers onto the rest of the bag.
- Then coat the target area with the varnish. It is to seal off the surface to prevent the bag from absorbing the adhesive.
- Fill the flock pump or flock sprayer with your flocking material.
- Next, use the brush to apply a thick and even layer of adhesive onto the target area. Make sure you leave no spot.
- Wear your mask and begin spraying/pumping the flocking material. Continue until you have covered the target area.
- Leave your project as it is for the next 24 hours in a place with zero-to-minimum dust.
- After this period, remove the papers and the tapes from the bag.
- Use a clean brush to dust away stray particles.
- Your hand-flocked canvas bag is ready.
Special instructions:
- When you open the adhesive can, mix it well until it is creamy and in one shade.
- Your adhesive colour should be the same as your flocking material. It is to avoid any unappealing results.
Take extra care of the particles of your flocking material. Otherwise, these fine particles will spread everywhere.